Edit FLAC Tags: Getting Started with Metatogger
This guide walks you through your first steps with Metatogger: loading a FLAC album, editing its tags and saving your changes. Further examples show how to recover information, add cover art and organize your files. To explore all features and advanced options, see the full documentation.
Tags are the metadata that describe your music: artist, album, title, track number or genre. This guide uses an album example to update information shared by several tracks without giving every song the same title.
Metatogger is free and runs on Windows 10 64-bit and later. It also supports MP3, Ogg Vorbis, Opus, M4A and WMA files.
Download Metatogger
If you are new to Metatogger, start with the three steps below. Otherwise, jump to the scenario that matches your files:
| Your situation | Where to start |
|---|---|
| Several tracks have the wrong artist or album name | Correct shared information |
| Track titles are in file names but missing from tags | Extract tags from file names |
| You know the album, but the files are named “track01”, “track02”… | Look up the album with MusicBrainz |
| You do not know the title or artist | Identify a track by its acoustic fingerprint |
| The album cover is missing | Add cover art |
| Tags are correct, but files are poorly named or scattered | Rename and organize files |
1. Load your FLAC files
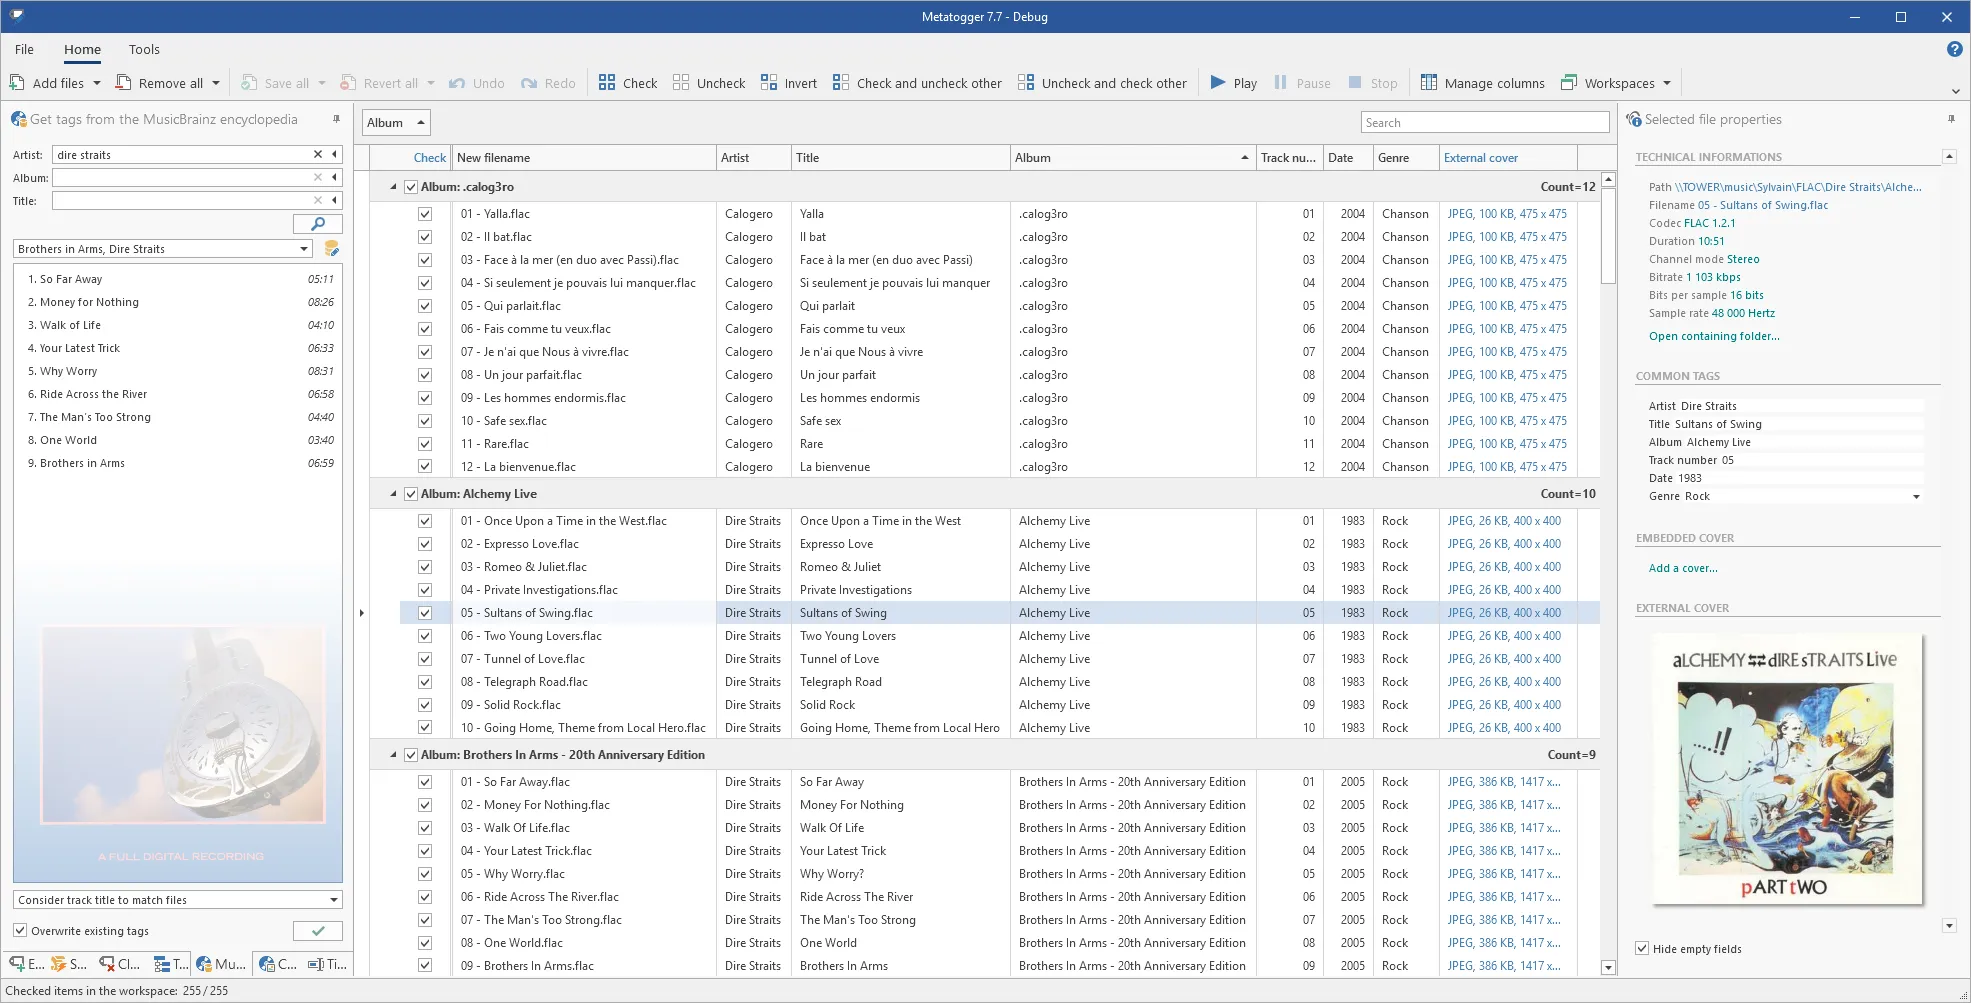
Section titled “1. Load your FLAC files”Open Metatogger and drag your FLAC files from File Explorer into the workspace. You can also use Add files or Add folders in the ribbon.
Start with a single album. Later, you can work on several albums together, even if their files are stored in different folders.
2. Batch edit information shared by several tracks
Section titled “2. Batch edit information shared by several tracks”In this fictional example, all tracks belong to the same artist and album:
| Tag | Example value | Apply to |
|---|---|---|
| Artist | The Riverbanks | Every track on the album |
| Album | Morning Light | Every track on the album |
| Title | First Departure | The corresponding track only |
| Track number | 1 | The corresponding track only |
- Select the album’s track rows using Ctrl or Shift + click.
- Focus the Artist column while keeping those rows selected.
- Press F2, enter the artist name and confirm.
- Repeat in the Album column.
This method changes the selected rows, whether their checkboxes are checked or not. Check your selection before applying a shared value. Edit titles and track numbers on the individual tracks they belong to.
The Add or modify tags tool can also edit several fields in one operation. In that tool, enabling a tag and leaving its value empty deletes that tag. Enable only the fields you intend to change.
Number the tracks on an album
Section titled “Number the tracks on an album”If track numbers are missing, first arrange the rows in the album’s actual track order. Sorting by file name works when names already start with 01, 02, 03, and so on.
Check only the relevant tracks, then choose Automatic in the Track number field of the Add or modify tags tool. Numbering follows the display order, restarting for each identified album. Check the order before applying the operation and review the resulting numbers before saving.
For a compilation, you can give every track the same album name while keeping each song’s own artist. Apply shared values only to tags that really are the same across the selected tracks.
3. Review and save your tags
Section titled “3. Review and save your tags”Modified tags appear in bold. Hover over a modified cell to see its previous value in a tooltip.
When the information is correct, click Save Selected to save changes to the selected tracks, or Save All Items to save all pending changes.
Before saving, you can undo the pending changes for the relevant items. Saving a workspace session does not replace saving tags to the audio files themselves.
Going further
Section titled “Going further”The following scenarios are independent: choose the one that fits your needs. After editing tags, return to the review and save step above.
Extract tags from file names
Section titled “Extract tags from file names”Example: your files are named 01 - The Riverbanks - First Departure.flac and 02 - The Riverbanks - By the Water.flac, but their tags are empty.
- Check the files that follow this naming convention.
- Open Get tags from file name or its path.
- For the file name, enter the pattern
|tracknumber| - |artist| - |title|, without the.flacextension. - Select a row to see the preview, then another to check that the pattern also fits.
- Apply the operation to the checked items, review the extracted tags and save.
The first file provides The Riverbanks as the artist and First Departure as the title. Characters between identifiers must match the separators in your names: here, a space, a hyphen and another space. Process files with a different naming convention separately.
The same tool can extract information from folder names. The documentation explains identifiers and patterns.
Look up an album with MusicBrainz
Section titled “Look up an album with MusicBrainz”Example: you know the artist and album, but your files are named track01.flac, track02.flac, and so on.
- On the File tab, click Update Database to download or update the local database if needed.
- Check only that album’s files and open Get tags from the MusicBrainz encyclopedia.
- Search for the artist and album name. If you get too few results, remove one criterion: search criteria are cumulative.
- Choose the release whose titles and track order match your files.
- For files named
track01,track02, etc., sort them in ascending order and choose Consider order to match files. If the order is not usable, examine matching by duration or title instead. - Review the match between each file and each track before applying and saving the tags.
If your folder contains only part of the album, click the missing tracks’ titles in the search result to disable them. They turn gray and are ignored during matching, helping avoid assigning titles to the wrong files.
Once installed, the tag database works without an internet connection. See the MusicBrainz documentation for other search and matching options.
Identify an unknown track
Section titled “Identify an unknown track”Example: a file is named audio001.flac and has no usable artist or title tags.
- Check the files you want to identify.
- On the Tools tab, click Tag From Fingerprint to start recognition with AcoustID.
- Review the artist and title found before saving the tags. The Cancel link in the status bar lets you stop the operation.
This method retrieves the artist and title, not the album or track number. The same recording can appear on an original album, a compilation or a reissue. Use MusicBrainz search afterwards to choose the release that matches your files.
Add album cover art
Section titled “Add album cover art”Example: the tags are correct, but your music player does not display a cover.
Before searching for cover art online, make sure the local MusicBrainz database is installed. If needed, open the File tab and click Update Database to download or update it. This prerequisite does not apply when adding an image you already have.
- Check the tracks on the relevant album.
- Open Get covers from the MusicBrainz encyclopedia, then search for the artist and album.
- Choose the matching image. If you already have an image file, use Open covers… or drag the image directly into this tool.
- Choose to embed it in the tags or copy it to the folder as an external cover.
- Review the resulting cover. If you embedded it in the tags, save changes to the relevant audio files.
An embedded cover is stored in each audio file. An external cover is a separate image file, named folder.jpg by default in Metatogger; support depends on the player you use. Downloading a cover requires an internet connection, even if the MusicBrainz database is already installed.
Rename and organize files using their tags
Section titled “Rename and organize files using their tags”Example: tags are now correct, but your files still have names such as audio001.flac.
- Check the files to organize and open Rename and sort files according to their tags.
- For file names, try the pattern
|tracknumber| - |title|. - For folders, an artist-then-album structure uses the pattern
|artist|\|album|. - Select an item to preview the resulting name and path. Check that artist, album, title and track number tags are filled in.
- Choose to copy the files to preserve the original layout, or move them to reorganize the originals, then apply the operation.
With artist The Riverbanks, album Morning Light, track number 1 and title First Departure, the expected result inside the destination folder is:
The Riverbanks\Morning Light\1 - First Departure.flacEditing tags and moving files are separate operations. For players that sort file names alphabetically, the supplied Use two digits for track number script can produce numbers such as 01, 02, and so on before renaming.
The Metatogger documentation explains naming patterns, multiple tag values, cover art and C# scripts. See the Metatogger overview for its other features.